Clover® POS stations are widely used in the United States and while it is noted as one of the most reliable POS systems on the market, there are always problems you may run into as a business owner. We are here to help you solve any issues that you may have with your Clover devices. Here are some Clover Station Troubleshooting tips that might help along with other suggestions for all of your Clover devices.
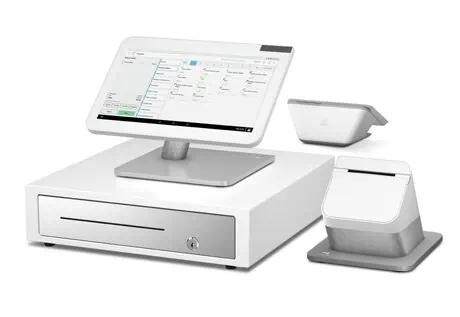
Clover Station Troubleshooting Tips
What To Do If Your Station Cannot Turn On
Is your clover station pro not turning on? Your Clover® POS station may not power up and start working all of the time. So out of all the Clover Station Troubleshooting tips we have for, this is by far the most common. Follow the steps
Checking Your Clover Station
- Plug the L-shaped end of your display cable into the display monitor.
- Plug the other cable end into the printer.
- Connect the power cable to the power brick.
- Secure the power cable with your receipt printer.
- After everything is in the power brick, plug the link attached to the brick to a power outlet.
- You can also plug the RJ-11 cable with your cash drawer into the printer, but that is optional.
It should take about twenty seconds for the computer to reboot. You should see the Clover logo after it finishes.
What If the Clover Station Still Isn’t Powering?
Is your Clover station pro is not turning on? In such case you might need to charge up the power source if the Clover Station doesn’t power. Charge your device for at least thirty minutes.
Completing a Hard Reboot
You will require a hard reboot of your system if it still doesn’t power up after thirty minutes. You can complete this with these steps:
- Remove the display cord from the bottom end of your station.
- Wait for ten seconds before you continue.
- Plug the cord back into the bottom part.
- The device will start to boot up. You can log in after the rebooting process is complete.
You can contact customer service if the problem persists.
What If The USB Pay Display or Clover Mini Isn’t Working?
Checking the Plugs
The customer display feature or Clover Mini may not be plugged into your overall station.
- Check the USB cord to ensure it is functional. There should be a Type A USB connection on one end and a Type B USB port on the other part.
- Plug the Type A side into a USB port under your station printer. There should be four of these ports.
- Plug the Type B segment into the second port from the left on the Clover Mini station that faces your customer.
We hope this Clover Station troubleshooting technique worked for you.
Install the USB Pay Display App
The two parts of the Clover Station, the main station and the Clover Mini may have trouble connecting via the USB Pay Display App. You may not have the latest software version of the application which could cause connectivity issues. When you are setting up your Clover Station, you the USB Pay Display App will install automatically.
Follow these steps if the system does not automatically ask you to download the app:
- Go to the More Tools section of the interface to access the App Market.
- Tap on the USB Pay Display app option.
- Select to install the app.
- Click the accept button to start the installation. The program should start working in moments.
- Open the app on both parts of your system.
- Check the USB cables if it spots an error. You may see a concern with the cables if there are any problems.
Clover Mini Is In Merchant-Facing Mode
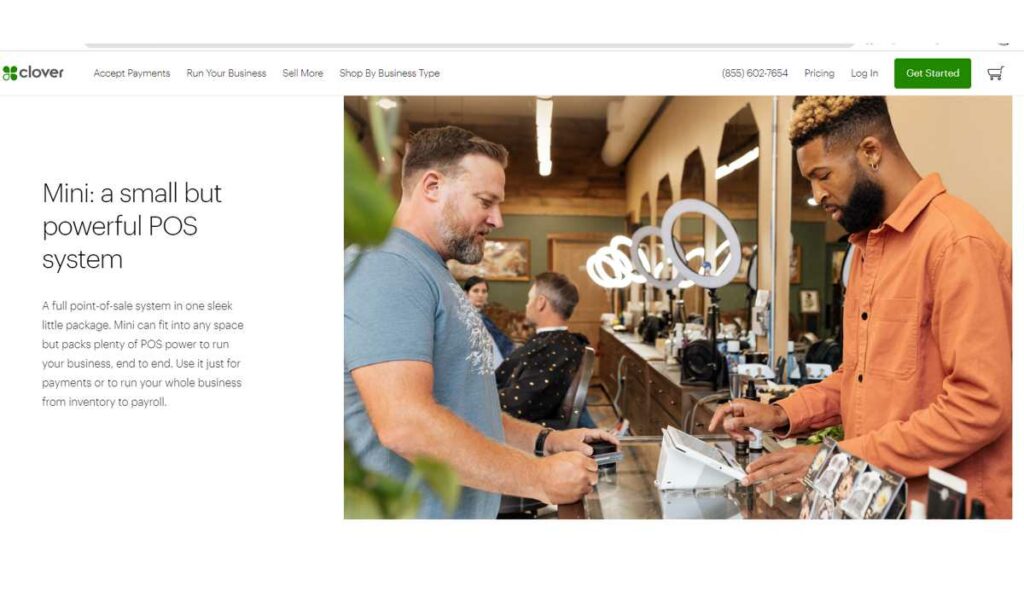
The Clover Mini should display “Welcome to (name of the business).” It will display a “Not Ready” message if the Mini is not in the correct mode, or if it displays the screen that should be merchant facing. In order to start processing transactions on your Clover Station, the Clover Mini may prompt you to open the USB Pay Display to initiate the connection between the devices.
You can reset your Clover Mini to the proper mode with these steps:
- Open the USB Pay Display program.
- Touch the screen once more to start the transaction.
Attempting to Start Transactions With the USB Pay Display App
The seller’s part of your Clover Station should say “Ready” when it is prepared to start transactions. You cannot start transactions by touching to open the USB Pay Display feature on the Clover Mini feature. Opening the app puts the Mini in the wrong mode where it displays what the merchant should see.
You can start a transaction by opening the Transaction app on the seller’s part of the setup. You can start taking in transactions from your customers at this point.
Error Message Appears on the Seller’s Station
The error you find may be from a customer’s card or from your merchant account settings. The network might have also timed out.
Any errors on the Mini may also display on the device the seller reviews. The time-out message may appear if the customer took too long. That message will display on both sides of the setup. Our Clover Station troubleshooting experts will advice you to contact the support team of the company if you are not able to understand the messages.
When You Cannot Find an App on a Clover Device
You will require the necessary apps on your devices for the Clover Station to work.
Search In the App Market
You can search for an app on the App Market with these steps:
- Launch the More Tools app.
- Search through the app categories, or use the magnifying glass search feature.
You can find whatever app you’re interested in through the system. You can select the View All section from any category, or you can use the Sort By option to find apps based on what people install the most or whatever is new.
The Device Stops Working
A device may stop functioning due to many issues, like shaking or dropping, or someone tampering with the unit. The encryption setup and other security features will still be working to protect cardholder data. But PIN-entry transactions and other sensitive payment options will be disabled from working.
Your device can still work for everything else, including taking customer orders and producing reports. You could also sync this setup up with different Clover devices. But you will not be capable of taking in PIN transactions.
You can ask for a replacement device if necessary. An admin must complete these steps:
- Open the Setup app and select the Payments option.
- Go to the PIN Entry menu, and then tap on the Prompt for PIN. Select the Save option.
- Tap the option to request a new replacement Clover device. The option should state that you’re doing this because you need to collect PIN payments.
- Tap the OK option.
You will get a notification from Clover Support with an activation code for your new device. Clover will also provide tracking data for your new item.
The replacement will be free if your old device is still under warranty. Shipping and handling fees will apply.
You can return the old device after you get your new one. The shipment will come with a return label. You can ship this back with that label in the same box you use when getting your new device.
Clover Station troubleshooting tips might not work in such case.
Is Your Clover POS Frozen?
Is your Clover POS frozen and not responding? Don’t worry as it is easy to start a frozen Clover machine. Before you start the process remove your machine from the charging station.
You should then hold down the power button for 32 to 40 seconds. The machine will turn off after this process. Now start the machine again by pressing the power button. The problem should be solved after restarting the machine. If it still doesn’t make any difference refer to other instructions on this page.
Your Device Is Missing
You can reach Host Merchant Services Clover Support if you have a missing device and you need to order a replacement. Your old device will be marked as missing by Clover when you plan your order, meaning no one else can use the device. Any information linked to the merchant account surrounding that device will be eliminated, including details on orders, payments, and reports. All account information will stay the same.
Your replacement device may be available in 24 to 48 hours, although the timeframe may vary surrounding based on Clover availability. Our Clover Station troubleshooting team can help you in such circumstances.
The Clover® name and logo are trademarks owned by Clover Network, Inc., an affiliate of First Data Merchant Services LLC, and registered or used in the U.S. and many foreign countries.
Additional Tips and Tricks For Merchants With Clover Stations And Other Clover Devices
There are some major advantages to owning one of the many Clover devices that the company has to offer. Merchants often describe a seamless experience, increased operational efficiency within their business, and enhanced cash flow for their day to day business. However, business owners always are looking to scale. We have compiled a list of information about the Clover Station and other Clover devices of the most commonly asked questions.
Which Clover Devices Accept NFC Contactless Payments?
Clover Go
Clover Flex
Clover Mini
Clover Station Duo
What Is The Best Dual Pricing App On The Clover App Market?
Although there is not a long list of dual pricing apps to use on your Clover Devices, there are a few that allow you to set up a Dual Pricing system for your customers. This is where you typically have two prices listed for each item, one being the “card price” and the other being the ‘cash price.”
For implementing a dual pricing system on your Clover Station or other Clover Devices, we recommend using the “#1 Dual Pricing App” by SPS. This app is available on the Clover App Market and has a 4.9 out of 5.0 star rating. This app is fantastic for the Clover Station Solo and Clover Station Duo. This app can also work on the Clover Mini and Clover Flex, but is most common on the Clover Station’s.
Clover Software Plans and Features
For Clover Stations and other Clover Devices there are different software packages that can be paired with specific POS Stations and other mobile devices. The following is a breakdown of the software plans offered by clover and the features and functionality that comes with each package.
Clover Payments Plan
Compatible With:
Clover Flex and Clover Go
Features:
Virtual terminal only
Clover Essentials Plan
Compatible With:
Clover Go
Clover Mini
Clover Flex
Features:
Accepts contactless payments
Customer facing online ordering
Virtual terminal for online processing
Ability to process offline payments
Paperless receipts
On-screen signature functionality
Employee scheduling
Clover Register Plan
Compatible With:
Clover Mini
Clover Station Solo
Clover Station Duo
Features:
All features from Clover Essentials plan
Robust Inventory Management (items, categories, modifiers, variants.)
Integrate weight scale and barcode scanner
Customer loyalty programs
Clover Table Service Plan (Full Service Restaurants)
Compatible With:
Clover Flex
Clover Station Solo
Clover Station Duo
Features:
Floor planning functionality
Apply service charges to late parties
Split checks in various ways
Card pre-authorizations for bar tabs
Run reports per “revenue center” (outside vs inside)
Online ordering capabilities
Contactless dining (scan to order and scan to pay)
Grubhub and Order with Google integration
Clover Counter Service Plan (Fast Casual & Quick Service)
Compatible With:
Clover Flex
Clover Mini
Clover Station Duo
Features:
Online ordering capabilities
Pickup and delivery ordering
Contactless dining (scan to order and scan to pay)
Grubhub and Order with Google integration
Item and order-level discounts
Ability to run reports per “revenue class” (food vs drinks)
Line busting capabilities (with Clover Flex)
Is The Clover Station Compatible With Any Kitchen Printers?
While all Clover Stations come with a front of house receipt printer, unfortunately there are no back of house of kitchen printers that come standard with the Clover Station Solo or Clover Station Duo. This is a common questions for quick service and full service restaurants who have kitchen staff and have a need for more than one printer.
For a kitchen printer that is trustworthy and works with both the Clover Station Solo and Clover Station Duo, merchants should purchase the Star Micronics SP700. This printer connects via USB and is proven to be a reliable solutions for quick service to full service restaurants.
